Showing posts with label KNOWLEDGE. Show all posts

Bee Inspired

"As a Beehive"
by Freshaire Designs
*
Pinned Image
Pressed Metal Lid
product and instructions found here, from Vintaj
I love the idea of giving an adorable jar of honey, like this one, to new Beehives.
Along with a tag reminding them of what it means to be a Beehive.
Infact, why not give them a jar of honey at Christmas or at the beginning of the New Year.
*
Pinned Image
Bee Humble Print
I could not find the source of this print.
If you know where it originated from please let me know.
After a mini lesson based on Gordon B Hinkley's 6 B's,

the girls could create their own "Bee" Print.
I love to see their creativity!

full talk here:

*
Bee-you-tiful Nails
idea found here
This would make for a fun Beehive class activity.
A mini lesson on what it means to "bee" beautiful.
Manicures and these cute bee inspired nails!
found here, FREE full size PDF here, from The Graphics Fairy
A beautiful tranferable print, to be used in so many ways...
Transfer onto wood blocks, pillowcases, canvas bags, it would be darling on a t-shirt.
*

Beehive (Hexagon) Quilt
idea sparked from Beehive Craft Collective
Why not hold a quilting Bee with the Relief Society women?
Have someone show the girls how to create a hand stitched quilt.
This hexagon design is a perfect representation of the Beehive.
*
Pinned Image
Visit a Bee Keeper
If you have the connections, plan a little outing for your class.
Let them see first hand what bees do.
Follow up by talking about what is means to be part of the Beehive class...
harmony, cooperation, work.

My Mini Room

If you have any girls interested in Interior Design, something like this might be fun...
*
When my daughter was in elementary school, she had to create a diagram of her bedroom.  This was such a fun project - especially when looking at the finished product.
*
If you look closely you will see that she printed off tiny photos of book covers from books she was currently reading.  She even printed off a tiny photo of Christ to place on the wall next to the door.  She created a laptop computer from carboard and scrapbook paper.  The Venetian blinds, pillows and comforter were also created using scrapbook paper.  The desk and dressers were fashioned out of cardboard (with stick pins - trimmed - used as drawer handles).  Accent pieces were borrowed from Polly Pocket.  :)
*
As far as an activity goes, the girls could all come with a box of some sort.  Have scrapbook paper, extra cardboard, glue and a few other "extra materials" on hand.  Have a mini lesson on Interior Design (which could be adapted to PP - KNOWLEDGE #2) .  Then they could spend the rest of the night creating their mini rooms.
*
*
RESOURCES FOR PLANNING
Decorating on a Budget
Design, New Era 1971
Let Light Shine through Cleanliness and Beauty, Ensign 1974

Beginning Cross Stitch

Here is another activity I have done with the young women.  Beginning Cross Stitch.  It would also be a great activity for the activity day girls as well.
*
Honestly, this turned out much better than I thought it would.  When the girls told me they wanted to learn how to cross-stitch I thought to myself, "Cross-Stitch? Really?"  Luckily, a quick refresher course and a few supplies later...  voila!  "You girls would be so proud of me!"
*
SUPPLIES USED
  • 14 count plastic canvas, perfect for beginners
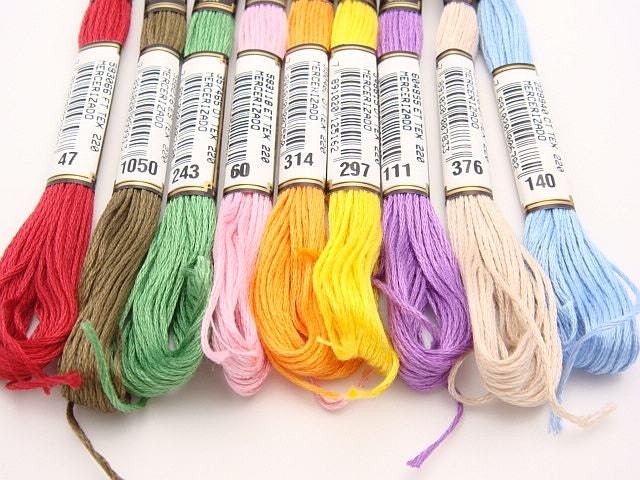
  • embroidery floss
  • 22 rounded needle
  • scissors
  • pencils
*
I went to Michael's and picked up a plastic canvas sheet for each girl.  My first thought was to purchase an embroidery hoop and fabric for each girl, but I am glad I went with the plastic.  I figured the plastic canvas would be easier to work with.  And it was.   
7-Count Colored Plastic Canvas Sheets
I admit, I needed a refresher course myself.  I found this:  Learn How To Cross Stitch In 5 minutes.  Just what I needed to get started!
*
I started by drawing a grid on the chalkboard and explaing in detail how to create a basic cross stitch.  Remember, I am a visual learner.  :)  I think that approach worked out really well.  We also went over how to thread a needle, knotting the end of the thread, and finishing a stitch.
*
There was some one-on-one instruction where needed.  But, the girls picked it up really quickly.  And we heard a number of them say "this is fun!".  :)
*
The girls used their pencils to draw a picture, a favorite quote, a design, whatever they wanted to on their sheet of plastic.  Then, using their new found knowledge, they began to stitch.
*
Here is a sample of a few different stitches (no, I did not stitch this):
*
Pinned Image
*
DID YOU KNOW?
The word 'Sampler' is derived from the Latin word 'Exemplum'. The meaning of this word being 'an example to be followed'. (You could create a great object lesson with this information, couldn't you?)  :)  Samplers are different examples of a stitches. It is generally believed that sampler stitching was carried out by young girls to encourage skills in stitching for use in later life. A sampler would probably have a variety of different stitches, and would be kept by the girl as a reference for future work. It would normally have been the particular individuals first attempt at stitching.
*
 The above sampler was done by 6 year old (yes 6),
Emily Shelton Sander, dated 1858.
*
During the 19th century, samplers became an important part of the school curriculum, young girls were encouraged to stitch to prepare themselves for their role as wives and mothers. These samplers tended to simple in their design, usually only having alphabets, numbers, their name and date, and the name of the school. The age of the stitcher ranged from as young as six up to about the age of fifteen years. The average age being eleven.
*
Creating a sampler would be a wonderful 10 hour project for the young women.  And a great addition to their hope chests.  :)  Just sayin'.
*
Here are a couple modern day samplers I found (plus a few more patterns):
*
Daisychain ABC's Crewelwork Sampler Pattern
available here for $6.00
*

found here
*
Arise and Shine Pattern
This and more LDS cross stitch patterns found here.
*

"Use it up, wear it out, make it do, or do without."
found here

Back to School Pep Rally


template here
*
PURPOSE  To help the youth understand the importance of living higher standards by choosing good friends, making wise choices, being involved in uplifting activities, and encouraging others to do the same.
*
**
FLYER

SCHOOL NAME
L.H.S - Living Higher Standards
*
SCHOOL COLOR
Gold - inspired by Virtue
*
MASCOT
The Mighty Bee - inspired by President Gordon B Hinckley's 6 B's
(I will create a happier mascot for future use)  :)
*
*
ACTIVITY
*
Q&A
  • As the youth arrived they were given a 3x5 card and a pen.
  • They were to write down any question(s) they have going into the new school year.  Here are a few of the questions our youth asked:  "What can I do to get good grades?", "Will my teachers like me?", "What time should I wake up in the morning?", "How should I keep myself from getting too stressed?", "How can you avoid jealousy?", "How do you avoid Senioritis?", "Will I have entirely new friends?", "How should I study, if I hate studying?"
  • Questions were then gathered.
  • While the youth were involved in the following activities, the leaders/panel of experts :) went through the questions and discussed answers.
  • It would be a great idea to have a few of the following available as resources for answers:  scriptures, For the Strength of Youth, New Era(s), and conference talks.
  • Answers to the questions were discussed at the end of the night.  Some of the answers were all in fun and made them laugh.  Others were more serious, like the answer to the question, "Will I have entirely new friends?"  The answer being, "Probably (this was discussed more), but be sure your best friend is Jesus Christ."
  • The youth were also good to add their thoughts, helping their fellow classmates
*
PEP SQUADS
  • The youth were divided into three equal groups or pep squads.
  • The were challenged to create a banner and a chant/cheer for L.H.S.
  • Side note:  While the youth were busy creating - the leaders discussed and wrote answers to the youth's questions.
*
PEP RALLY  n: a mass meeting featuring songs, cheers, and inspirational talks
  • When banners and cheers were completed, everyone came back together for the Pep Rally.
  • We started by answering their questions.
  • Next each group was invited to hang their banners and share their cheer with the group.
  • Side Note:  It would have been fun to have pom poms and megaphones on hand for their use.
  • End the night with a few last words of encouragement for the coming school year.
*
TAKE-A-WAY
  • The youth were given a simple brown lunch sack filled with the following items:  pen, highlighter, magnet set for their lockers (great DIY marble magnet instructions here), pencil with eraser (you could also use a simple eraser), Smarties, Snickers, butterscotch candies, Hershey Kisses, Now&Laters, M&M's, gum, and a faux dollar bill (you could also use a 100 Grand bar).
  • Each item had a little tag of encouragement to go along with it. 


  • I also had nail polish on hand.  Just in case the girls wanted to add to their school spirit.  They were excited!  I even painted my nails.  I'm not sure if it is my color though.  :)
*
ADDITIONAL HELPS
*
AFTER THOUGHTS
These would have been a cute treat to share at the end of the night.  Playing on the Mighty Bee Mascot idea.
*
*
By the way - Let me know if you would like the templates for L.H.S., I am happy to share!

Terrariums: A Tiny Garden Party

This is something I'm working on.  "A Tiny Garden Party".  Wanted to share.  And gather your ideas.
*
How fun would it be to host "A Tiny Garden Party" where each guest created and went home with their own Terrarium.  Beautiful little gardens of their own creation.  Small enough to sit on a side table, kitchen counter, or a dresser in their rooms.  As for containers, there are so many choices.  Anything from a 2 litter plastic bottle to a more sophisticated glass vase.
*
I would love to teach the young women how to plant their own terrariums, of course coupled with a lesson!
* 

terrarium by DoodleBirdie
**
LESSON
As I read the paragraph below, a number of different analogies came to mind.  Without spoiling your own thoughts...  what gospel centered principles come to your mind when you read this particular version of the story of how the terrarium first began?
"One hot summer day a man walking through an arid field, where all plant life was withered and dry, saw at his feet an unbroken bottle lying on its side.  Inside the bottle was lush green growth. Through wind and rain, soil and seed had drifted into the bottle; and there, protected from the elements, the seed had germinated and grown. The moisture within the bottle condensed each day and fell upon the little plants, and so they grew in their own small hothouse in the parched field."*
SUPPLIES
  • 1 or 2 small plants:    Possible plant choices for Open Terrariums -Fittonia, Ivy, Palms, Philodendron, Syngonium, Begonia, Airplant, African Violet, Aluminum Plant, Asparagus Fern, Baby Tears, and Bloodleaf.  And for Closed Terrariums - Fittonia, Palms, Philodendron, Syngonium, Begonia, Bloodleaf, Ficus, and Croton.
  • glass jar or plastic container, large enough to hold plants with room for growth
  • bag of small rocks or pebbles
  • charcoal or fired clay pellets
  • sphagnum moss
  • potting soil
  • wooden skewers or twig, to extend your reach and aid in the planting process
  • tiny plastic trinkets, to add interest
  • creativity
INSTRUCTIONS
  • Put about an inch of pebbles in the bottom of the container for drainage.
  • Add a layer of charcoal to keep odors at bay.  Note:  charcoal only works for a couple of years.  If you plan to maintain your terrarium for longer, substitute a layer of fired clay pellets.
  • Add a layer of sphagnum moss to keep the potting soil from seeping into the drainage level. (If you pack the drainage level tightly, you can skip the moss.)
  • Add an inch or two of potting soil and begin planting.
  • Top off the landscape with rocks and plastic trinkets. Spritz with water. Sit back and forget about watering for a while.
  • NOTE:  Once established, terrarium plants can go weeks or even months on a spritz or two of water. That's because the water evaporates from the plant, but remains inside the container as condensation moistens the soil.
  • Open Terrariums need only occassional watering, water lightly.
  • Closed Terrariums watering needed only when fogging on the sides stops or plants starts to wilt
*
RESOURCES

Refashion Show

This refashioned sweatshirt (below) made me think of you girls.  "You and your cute selves!"
*
It also got me thinking about putting together a "Refashion Show" with an emphasis on modesty of course.  :)
*
Wouldn't it be fun to have the Young Women and the Relief Society Women work together on this project?!  It would definitely qualify for a 10 hour project for one or more young women.
*
PERSONAL PROGRESS POSSIBILITIES:
  • Choice and Accountability - under the direction of your parents or leaders, organize or participate in a discussion group, fashion show, or other event to help you and other youth choose to live the Lord’s standards.
  • Divine Nature - Develop a skill you could use in your future home, such as cooking, sewing, making repairs, organizing, or designing. Teach that skill to someone, and explain how establishing a house of order.
  • Knowledge - Learn a new skill or talent that will help you care for your own future family or home (for example, playing the piano, singing, budgeting, time management, cooking, sewing, or child care). Share with your family, class, or Young Women leader what you have learned.
*
Let the ideas begin to gather.
*
SWEATSHIRT REFASHION
tutorial here
*

SWEATER CAPELET WRAP
tutorial here
*

BOLD LEATHER FLOWER BELT
tutorial here
*

BLOOMING BIB
tutorial here

Storytelling

I'm a little excited about tonight's activity.  In planning class activities, the girls decided they wanted to have a storybook night.  A night when each young women would bring their favorite children's book to read.  How are we turning this into an "opportunity for learning and growth"?  A night geared to learning the art of storytelling.
*
The night could also prepare the girls for a future service activity.  Set aside a time for the Young Women to host a storytelling night for the primary children.
*
GAMES
The night will began with a couple games.  I found some wonderful instructions for storytelling here.  The following games came from Session 4.
*
“Counting from One to Ten" Game:   learning to speak with expression
1. Read a paragraph from a book in a monotone, and then read with expression.
2. Discuss their reactions.
3. What is the difference between the two?  Clearly, monotone is the way we speak when we don't want people to be interested in what we are saying, so we need to put expression into our storytelling.
4. Now call on different young women, asking them to count from one to ten:

  • As if you were an angry parent who said, "I am going to count to ten and if you're not in the bedroom by the time I get to ten you're in big trouble."
  • As a toddler just learning to count
  • As if you were very sad because you thought everyone had forgotten your birthday, but then you walked into your living room and saw ten birthday presents sitting on the floor. How would you count them?
  • As if you were a referee for a boxing match and you were counting someone out
  • As if you were telling someone a telephone number over a bad connection
  • As if you were counting pennies as you dropped them into a piggy bank
"Pass the Face" Game:   learning facial expressions
1. Sit in a circle.
2. Start by making a face and showing it to everyone in the circle.
3. Then, turn to the person beside you.
4. That person copies your expression and shows it to everyone then makes a different face and passes it on to the next person.
5. Round and round we go!
*
TIME TO READ
Next the girls will take turns reading their books to the group.  It should provide a great opportunity for the young women to practice public speaking in a small group, not to mention using fun material.
This is the book I am going to share:  Do Princesses Wear Hiking Boots?

*
SNACKS
To go along with the "youthful" theme, we will snack on Jell-O jigglers, popcorn, plus all the goodies the Young Women bring to share.
*
ACTIVITY (time permitting)
Time permitting, we will make Yarn and Cereal Necklaces, blow bubbles, and maybe even play with play dough.  Who knows?

{Caramel Apples}

Tis the season for a good carmel apple.
We thought it would be a good idea to share and teach the Young Women how to make them from scratch.
*
Lyndsey and Kim getting a little carried away with the caramel.  Silly girls!
*
This is the best recipe for carmel, its simple and really easy to make.
*
Carmel
1 Cup Brown Sugar
1 Can Sweet and Condensed Milk
3/4 Cup Corn Syrup
1/8 tsp Salt
Cook on medium heat, continually stirring so it does not burn. Bring to a soft ball stage.
When it comes to the softball stage let it sit for 1 min and then add:
1/4 Cup Butter
1 tsp Vanilla
Stir until butter is melted.
** Optional: After dipping your apple drizzle milk and white chocolate over them**

Lovely Little Cakes

"Cake is often the centerpiece at any Celebration"
*
*
Tonight the Young Women discovered a few fun and easy cake decorating ideas, with items they may already have in their own cupboards. Some of those were marshmallow flowers, faux fondant cutouts (made with Airheads and micro cookie cutters), and designs in chocolate. There was also some instruction of various frosting techniques.
*
It was so fun to see their creative hands at work. At the end of the night they each went home with a "Lovely Little Cake" to share. Or keep all to themselves! They all did such a wonderful job. I thought each cake was absolutly adorable!

*
FLYER
WORKSHEET:
PLANNING
1. I made 2 individual cakes for each young woman, using these mini springform pans. I made it simple and used Betty Crocker's Yellow Cake Mix. The girls loved that they could make their own mini cake and take it home with them.
*
2. Next, I whipped up a batch of buttercream frosting.  Make plenty!  Here's a good recipe:  buttercream frosting

3. Set up banquet tables, cover with plastic table cloths (makes for an easy clean-up), and chairs for each young woman and leader.

4. Have the following items for each young woman and leader (or have them bring their own):
  • Pastry bags with plastic couplers (large ziplock bags will also work)

  • Assorted decorating tips

  • Straight and offset icing spatulas

  • Rotating cake stand or lazy Susan (optional)

  • Food coloring for tinting icing

  • Mini Marshmallows and lots of random sweet stuff for decorating


ACTIVITY

Cake Decorating 101
Using a Coupler:
A plastic coupler allows you to use different decorating tips while piping from one bag. To change decorating tips, unscrew the coupler ring, replace the decorating tip, and replace the ring.
Filling a Pastry Bag:
1. "Cuff" the bag top over one hand, or place the bag, tip down, in a tall glass and fold cuff around the rim. Insert icing with a spatula using your other hand, scraping the icing against the side of the bag to release it. Do not fill the bag more than halfway. Unfold the cuff.
2. Gather the top edges together with one hand, and drag the thumb and index finger of your other hand downward to let out air, forcing icing into bag and decorating tip. Twist the top of the bag to close and to maintain pressure.

Frosting the cake:
Creating the Perfect Base: Every icing job begins with a smooth layer of base icing.
1. Place a chilled cake on a platter or cardboard cake round, and transfer it to a rotating cake stand. Smooth on a base layer of slightly chilled buttercream with a straight icing spatula to seal the cake crumbs. Chill the cake until icing has hardened, about 15 minutes.
2. Coat the sides of the cake with 1/4 inch of buttercream. Hold the spatula parallel to the sides of the cake with the blade slightly angled towards you. Apply pressure with the spatula against the sides of the cake, and use your other hand to rotate the cake stand, smoothing the sides.
3. Spread excess icing from the sides onto the top of the cake and add more to coat. Position the spatula almost flat halfway across the top of the cake. Apply pressure as you rotate the cake stand, smoothing the top. Chill until the icing has hardened, about 15 minutes, before decorating.
*
Decorating the cakes (unleash their creativity!):
*